A new server!

An incredible thanks goes to my good friend Robin for giving me a brand new HP ProLiant ML350e Gen8 Server for my home lab!

Blue for no errors detected!

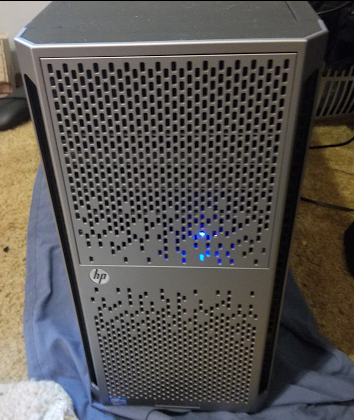
This server looks really awesome, and is definitely an upgrade to my existing two Dell R710’s. I borrowed some RAM from them and have setup this server with an 250gb SSD. Eventually when I get more RAM I’ll be moving all of my existing ESXi VM’s over to this server and retiring my first Dell R710. The more modern HP RAID controller is better able to utilise SSD speeds compared to the R710’s PERC 6i controller. In addition, the included single Xeon e5 2420 v2 is more power efficient than my dual Xeon x5650(s).

The guts of a powerful machine.

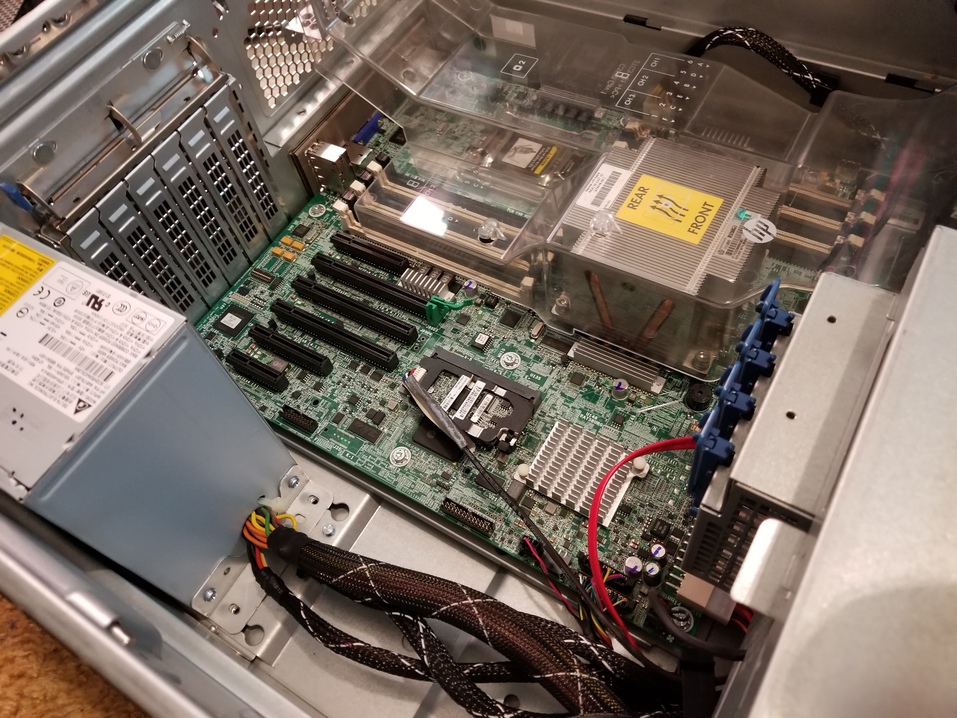
I used a watt monitoring meter to measure the amount of watts this server draws at idle compared to my R710. With zero disks, no PCI-E cards, and only using iSCSI storage, my R710 averages out to ~130 watts of power usage at idle. This compares to two PCI-E Ethernet Cards, and an SSD inside the HP server, using about ~40 watts of power at idle. The power savings of newer hardware absolutely cannot be underestimated when upgrading enterprise equipment.

Originally, I was going to use this HP server as a FreeNAS storage box. However, having a PCI-E card installed inside the server causes the fans to hover at about ~40% of max RPM at the lowest power draw. This is very loud compared to my Dell Servers!

As I can’t sleep with the excessive fan noise, I’ve had to halt my plans for an HP Proliant FreeNAS server. Instead, I’ve repurposed an old workstation computer as a FreeNAS server. At the very least I can enjoy an iSCSI Target over my network until I find a place for the HP server.

I’ve been playing with the built in ILO dedicated management card and must admit it’s a nice out-of-band management solution. Compared to my R710’s iDRAC 6 out-of-band management the ILO offers more information and just works a lot quicker than the iDRACs. Obviously, the ILO management is newer in age – giving it an advantage. I’m just happy to be able to learn and experiment with the HP enterprise ecosystem. I look forward to expanding my home lab and finding a use for everything!

Thanks again Robin for this awesome server!

Learning about Cryptography.

As part of on-going studies towards my Security+ certificate, I’ve recently learned about Symmetric and Asymmetric cryptography.

To put into practice some words from a textbook: I’ve created a public GPG key for Asymmetric cryptography!

You can use this key to encrypt binary files or text messages that only I can decrypt. This process is known as Asymmetric cryptography – as there is a unique secret key I keep and another Public key for anyone to use. Encryption like this is important for maintaining security across the globe. The process uses algorithms to transform plaintext data (Or basic binary data such as an image) into something called ciphertext. The algorithm itself is called a cipher. The ciphertext is effectively a bunch of gibberish that is unreadable without something called a “Private Key”. The two part output of Asymmetric encryption is a Public Key and the Private key.

The Public key can be used as a one way process to send secure data across an unencrypted medium. The additional security provided by a GPG Public key ensures confidentiality when transmitting packets over the internet.

So please send me an email to everett@everettdahling.ca using the following key:

-----BEGIN PGP PUBLIC KEY BLOCK-----

mQENBF08B30BCADBgWO9gscPxKz8WztH4dQJOz5WbHNfefOT9QctsIk06lORgz5V
8c9OSBPOHcEVRoIoOpUU0Sl1LS7SODfndb0uTk3NSWswGlDKJdeW1yhd8xDZK0RB
hcSLUU8satQagTLMrN878Bno4aJwGdEcJzE4qw9S45En0EUkuUW/qBOyS98aQrBx
D1GVZ1TTiW2n0eEsDSK5resz7346uq05+baRxNrYS+9E1Ms+Sz6w8pN4AEw+dmXE
fvWDAiqQGGaDnkrm1DfY9de6faLAQ4Wx5vgpNjgvsuJyAgC25sy7S+GUN9hNSBxk
4xmciZ+kJJvsY/QBQ+zCtNJVaYwSosZxujDFABEBAAG0K0V2ZXJldHQgRGFobGlu
ZyA8ZXZlcmV0dEBldmVyZXR0ZGFobGluZy5jYT6JAVQEEwEIAD4WIQQYU194Ic0B
EqkdaK+6DFdA2FemIQUCXTwHfQIbAwUJA8RQMwULCQgHAgYVCgkICwIEFgIDAQIe
AQIXgAAKCRC6DFdA2FemIbotCACpys/S/Vj5UbRqwnytCIlCKFe2kVP+/dXYMchw
5fFWN+tm14LristcT69J70b+cPKdADLvbpoJ/YmVwHRtYTCOocQViRjXhyAOm+Rp
XUmI1LfIEuGZEJebuZ6emhNXALg31/g8A2EWccMolhq0LklUyK9uGv/wRq1JOPFa
YV1RWY+jCwNkbqBXTVpgeT57jGSZlVxinkWD/R9uPk+oAV7F9RI++pFf2Z8T9RdE
1XWO0VlR2djl7SZCFbZGJfgf1zSdv0gOfdlTZ80fQVqQg2p+x1IUGXXqAtcmweQH
jhqYH6n0GV8UvtNga8jjLoVJAbeTCurFx7lClHyJgLMnoITeuQENBF08B30BCACt
WWexMLMcc1+riT9tql3zfRWV1m4LvKL+Lqn9YRDBxdUZlA4S5jsEWMLVPWMFWTpT
SqypF/41YfccklXfbBmAPdrj/8o9wuUixhYn4NOFGTlYcnNd6LPEyELdhcl+MXys
391EkNPMReBFAvDUt8ncasJnP32pXQyzgG+Y8tkhJn41cY8ju8/AKSECneByT7Rz
oDeAnY0lugvVknVsLuJR1vWDd6qmgt483E6l73yIBPgv2lZEE5cOK+GX1HgjFj/c
MG38KhGcBGPRN/NyzfDg6N9vnCQKtDSj2Upc5UykBcj6Ya3T14DisFrvtDx6HJpQ
bNKb5cqiCr2tzibaZcM/ABEBAAGJATwEGAEIACYWIQQYU194Ic0BEqkdaK+6DFdA
2FemIQUCXTwHfQIbDAUJA8RQMwAKCRC6DFdA2FemIdYXB/9t3VInlHnjD+RiQ/6k
orcFnpou//aKJoRZX9AFDTSCRqrOSLZsYoJDyTDZf2vFuk+qvu373lfKgvad6eai
QNZ6be17pq3/BsulgLMMB5TS+Ugr/acr5xSVKPplViS7aL0LAopHPrOmtYXN8qtj
l901BWFKOxoGNhaCnAdvtmCPJ4D5gBWIr+9OaDP/GApy8X4m2a8Qyv1ZyaYHgdt1
FF6x5eWJq/9p+Ugq7iBHKig5sYwI8dGUMRZQwPFLeMKptoFMEgyaVzXPOxIsHkWd
Heourge3eGCWGOJzeoV4T075qGviqXjYAH1+nRuLjfOM00wtLn/eEdz04z4m+l9V
X181
=lshS
-----END PGP PUBLIC KEY BLOCK-----

(Copy and paste the entire block into a text file and use something like Kleopatra to encrypt the data.)

My fingerprint is: 1853 5F78 21CD 0112 A91D 68AF BA0C 5740 D857 A621

A final project demonstrating a full year of learning.

Introducing: Everett Hosting Services – a concept website using Docker to produce WordPress containers.

Welcome to Everett hosting services!

I created this site to serve as a proof of concept. The site allows you to create multiple Docker containers running either WordPress or Drupal websites.

As I had learned a great deal about Docker containers during my practicum, I wanted to build a functioning website that could bring everything together.

These containers are behind an NGINX reverse proxy and use LetsEncrypt certificates for SSL connections. The site also creates a unique database username and password for each container created. It is a culmination of my entire year of education towards my Information Technology and Applied Systems diploma. I took aspects of almost every project I’ve done throughout the year – such as programming in PHP, configuring Linux daemons, writing BASH scripts and working with container software. I used entirely open source technologies – such as Linux, PHP, Docker and Bootstrap to build this platform.

 ** Note: I’ve blocked outside access to the site for security reasons (Am by no means a professional programmer). If you’d like access, send me a message. 🙂

Here’s a live demo of my recent work: